
I know it's a cliche, but pizza is one of my all-time favorite foods, competing closely with ice cream and really good Indian food. I could eat pizza every day and not get tired of it as long as I got to change up the type and toppings. I just had a stroke of genius for an Indian pizza where you take a naan and put some tandoori chicken and a curry sauce on it. My wheels are spinning. That sounds amazing. But I digress...
For a more traditional, Italian style pizza, I've gotten really into making pizza at home. Partially because buying pizza, even if you get a frozen one, can be expensive. When you consider how inexpensive the ingredients are, you realize the pizza industry is a real racket. And nothing gets my goat more than a racket. (Apparently today is talk like your grandpa day in MiloLand.)
The other weekend I made a pizza for my Dad and I, but I was hungry and didn't want to wait for a yeast dough to rise, so I found a quick bread recipe to use as my crust.
It turned out well when baked on stoneware, but if you don't have fancy schmancy stoneware in your kitchen arsenal, never fear! A very hot preheated pan should work fine. The only tricky part to this approach is you need to have two baking sheets, one with an open end. If you don't have a tray with an open end, just use the bottom of one.
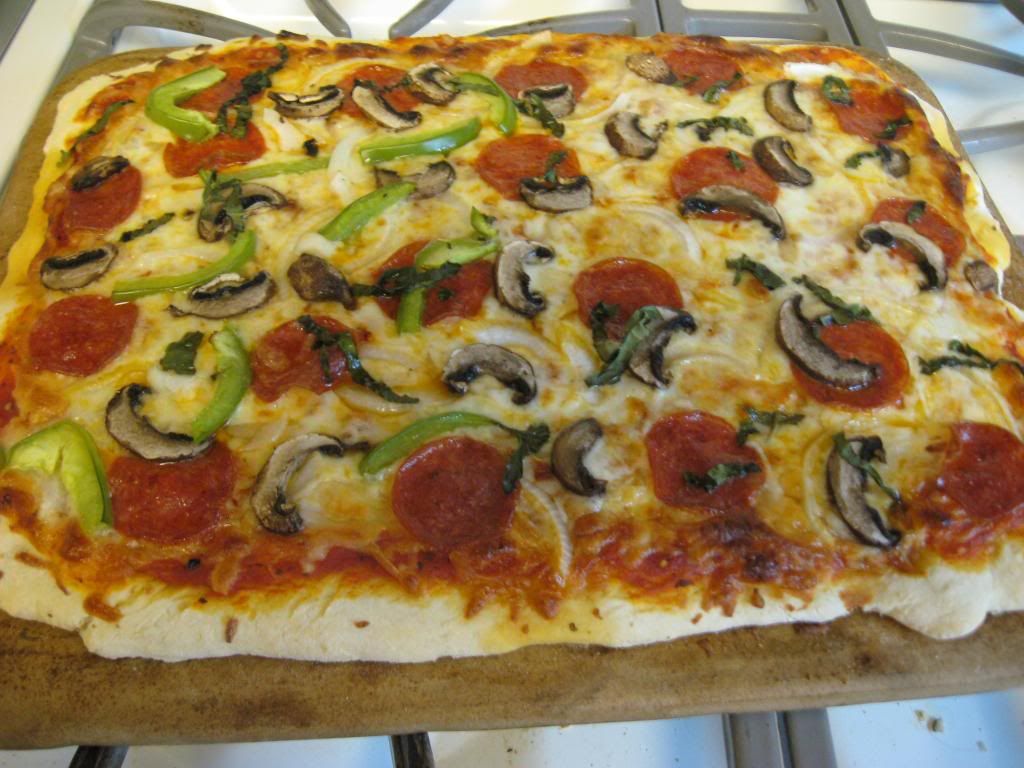
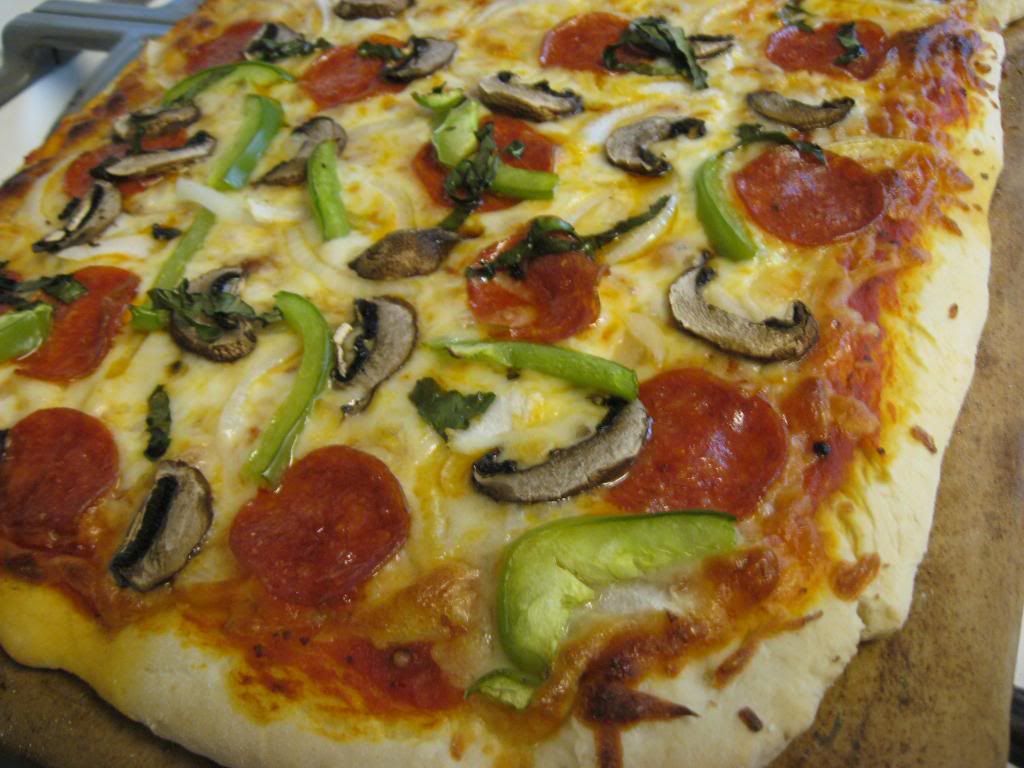
The crust on this pizza turned out more like a thin crust pizza, but with a softer, breadier consistency. It didn't have the height you get with yeast because of all the air bubbles being released. But it wasn't that crispy, wafer thin crust you get when the dough is worked and stretched. This was a happy medium, nestled somewhere in between the two extremes. And since you're making it at home, you can load it up with whatever toppings your heart desires.
Stoneware Baked Quick Dough Pizza
2 1/2 cups flour
2 3/4 teaspoons baking powder
1/2 teaspoon salt
1 tablespoon oil (EVOO or vegetable)
3/4 to 1 cup water
Marinara sauce
Mozzarella cheese
Paremsan cheese
Whatever pizza toppings you like
Combine the dry ingredients in a bowl, using a whisk to incorporate everything evenly. Create a well in the middle, and poor the oil and 3/4 water into the middle of the well. Use a wooden spoon to stir, starting in the middle and gradually allowing more of the dry mixture to join in off the sides. If the dough seems too stiff, like it won't take in all the dry ingredient, add a little more water a tablespoon at a time. You should end up with a dough that is soft but not super sticky and wet.
Dump the dough out onto a very well floured surface and shape into a ball. Flour the ball and the surface more if it needs it, and then start to knead the dough. Start by using the heel of your hand to push down on the dough away from you and then fold it in half along the indent you just made. Turn the dough 90 degrees, and repeat again. Congratulations, you are kneading! What you are doing is creating layers in the dough, and stretching out the proteins that hold everything together.
Knead the dough about 8 times and then see how it's too doing. It should be firmer than when you started, have a somewhat elastic quality to it, but shouldn't be hard to manipulate. If you start to meet resistance when kneading, stop immediately. You are going to end up with leather. If after kneading it 8 times it still seems too mushy, knead it some more.
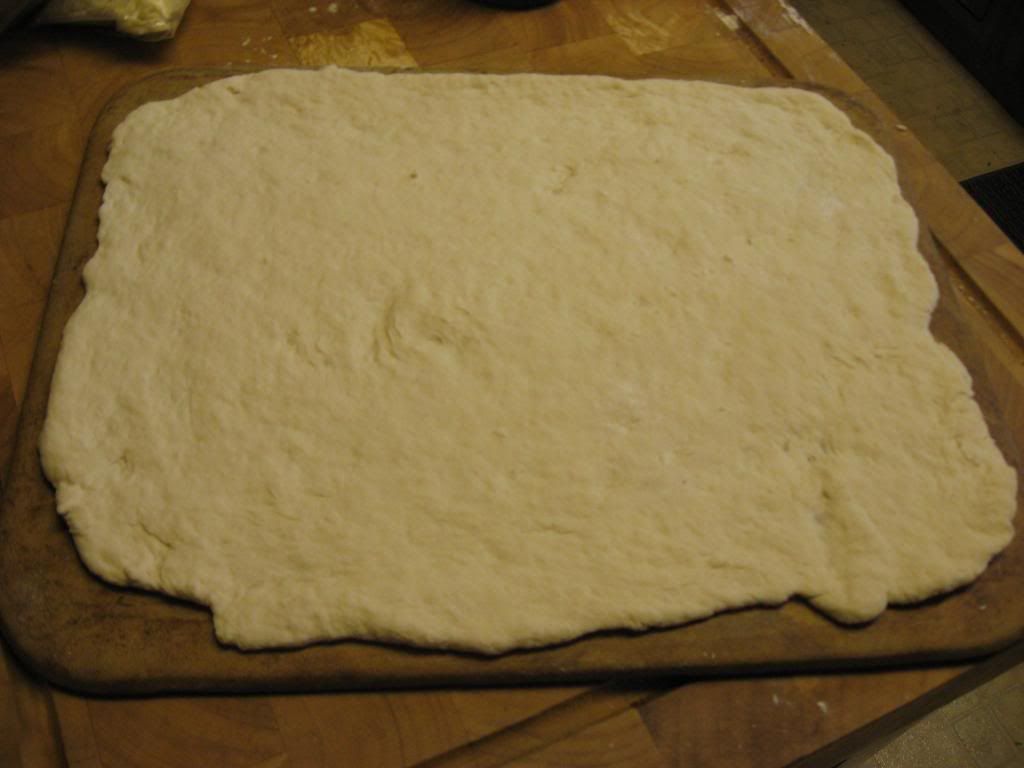
Once you are happy with how the dough is, you can either roll it out to your desired shape, or get all Mario Batali and shape it with your hands. Once you've got it how you want it, transfer it (either by picking it up or doing the rolling pin method that we talked about in the pie post) onto a WELL FLOURED sheet tray that has an open end. If all your sheets have lips, just put it on the bottom of one. Trust me, I know what I'm doing. I stayed at a Holiday Inn Express last night.
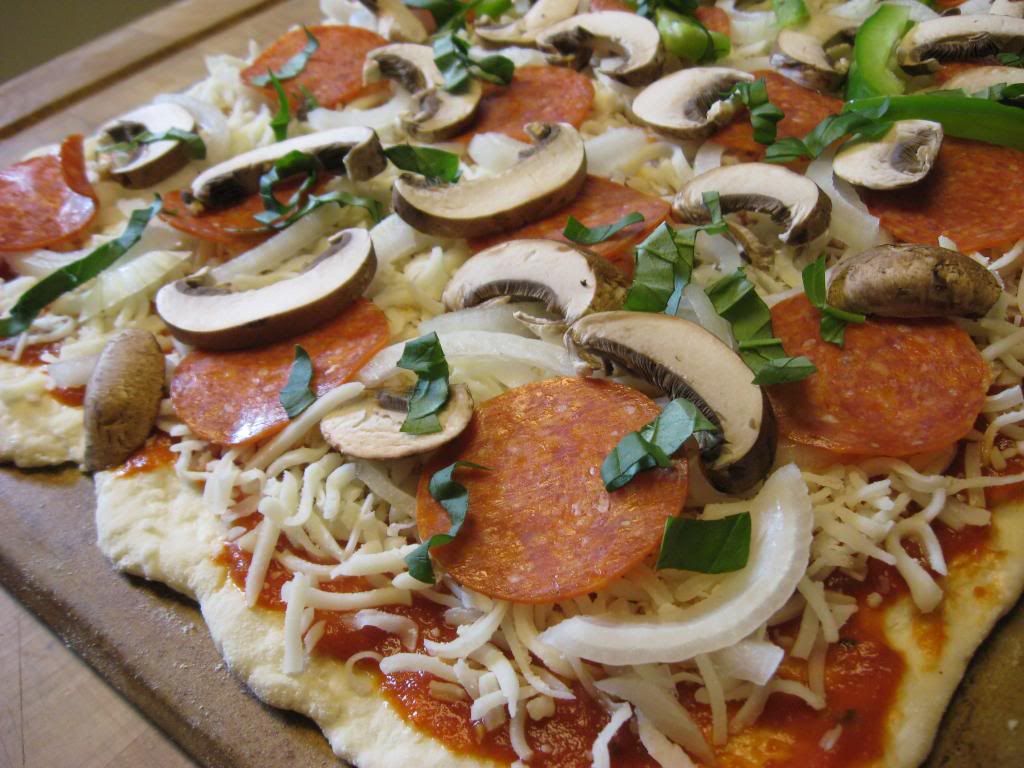
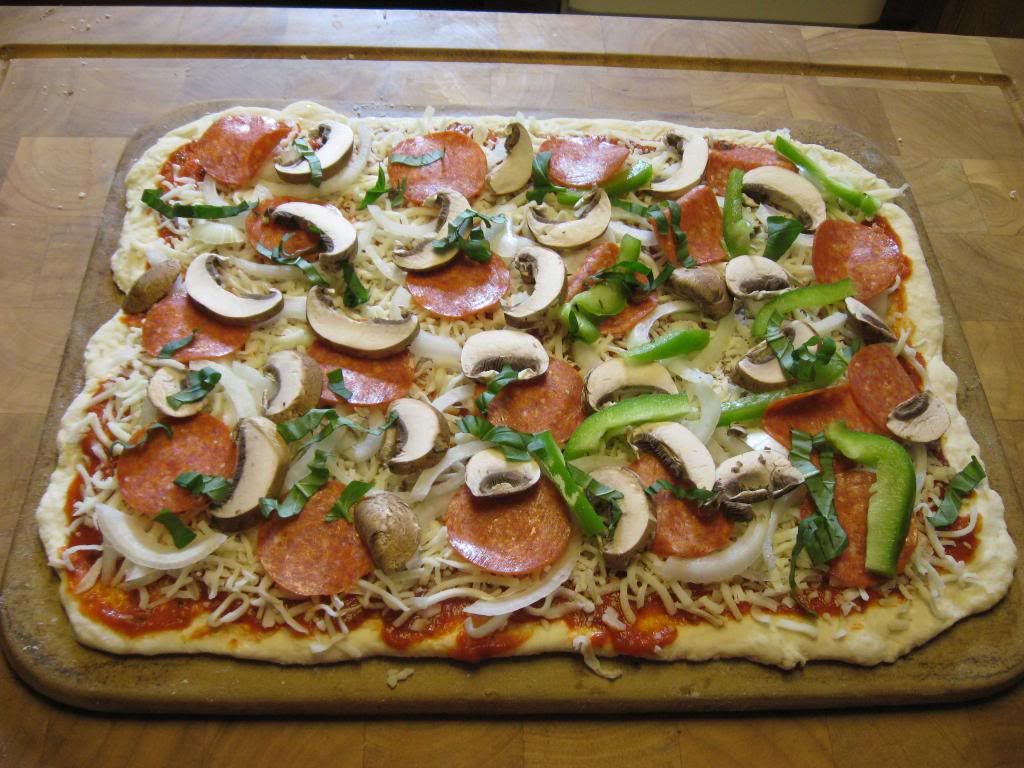
Preheat your oven to 400 degrees, and put another sheet tray in the oven. Or, if you have a flat stoneware baking tray, put that in the oven. Now comes the fun part. Load up your pizza with your favorite sauces, cheeses, and toppings. On mine I put marinara, mozzarella, mushrooms, onions, green peppers, Parmesan cheese, and a chiffonade of basil.

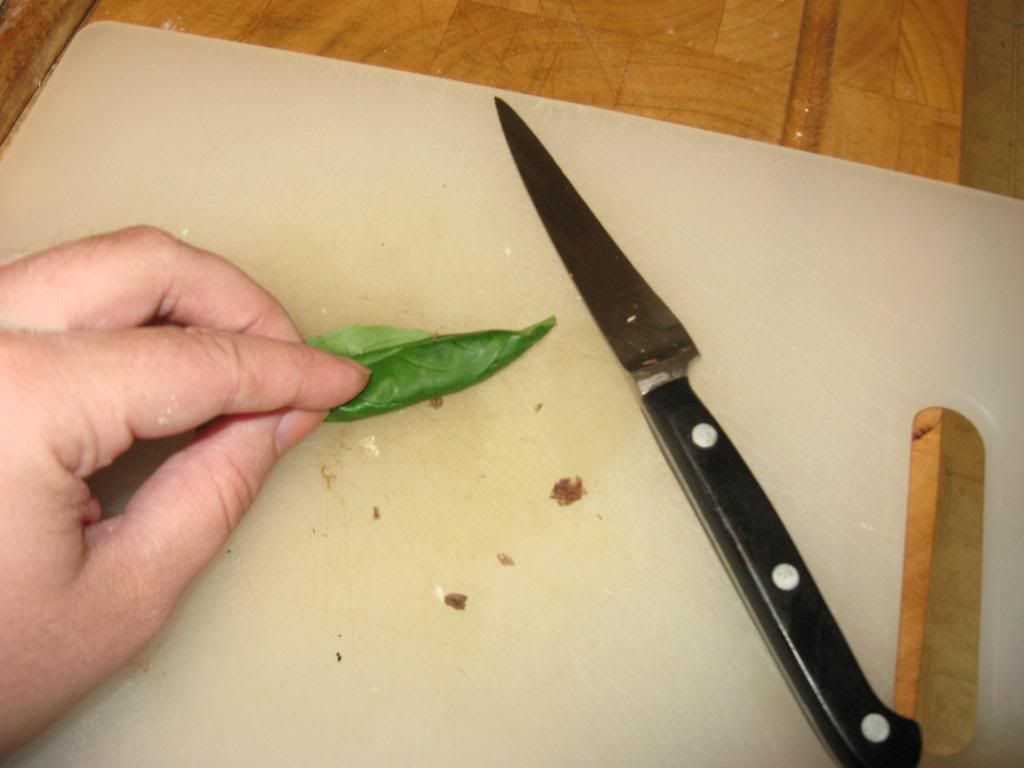
What's a chiffonade, you ask? The best way to cut basil, is the answer. A chiffonade is a way of slicing herbs into long, thin strips, and it's particularly good to do with basil because basil is very sensitive and bruises easily. So when you cut it you want to make sure you slice it and not chop it, or else the leaves will be bruised and angry with you.
To make a chiffonade of basil, start by stacking your leaves, starting with the biggest one on the bottom and decreasing in size. Face them so they are kind of cupped into each other. Then roll them up like your making a cigar. Using a super sharp knife, slice your log into thin strips. You will end up with lovely little ribbons of basil that are bruise free!
Once you have the toppings of the pizza satisfactorily arranged to everyone's liking (I had to keep the green peppers limited to one half because my dad doesn't like them), you are ready to transfer your pizza.
Take your preheated pan out of the oven. Then take your tray with the pizza-- that you very cleverly floured so the dough wouldn't stick-- and slide the pizza off it onto the preheated pan. This is why it was critical to have a pan with an open end. Sliding is key. Put the preheated pan that now has a pizza on it back in the oven and back for 20-25 minutes or until the cheese is bubbling and the crust is browned to your liking.
No comments:
Post a Comment